Thursday, March 15, 2012

shamrocks and rainbows!

I went a little out of my mind with creative excitement this week and didn't write down where I got any of my ideas from!!  I get so INTO pinterest and flipping through facebook pictures...I love others creativity and unique idea's!  So if you have seen any of these projects before (on pinterest or a blog), then YEP that's where I got my ideas from ;]
SHAMROCKS - ART
Supplies we used for the creation of our shamrocks...
1. self laminating 8.5 X 11 sheets
2. green sequins (big and small)
3. dark green, light green and gold glitter
4. green shimmer confetti (from the gift wrap section)
5. dark green and light green (ripped) tissue paper
6. shamrock stickers 

When all 'decor' desired is stuck to the self laminating sticky paper, then place another sheet of self laminating sticky paper on top of it.  Have the kids walk on it until lamiation is complete :]   Cut out a shamrock shape and you have a finished product!  Bad pictures...but they sparkle and shine when the sun shines through :]

RAINBOWS - SCIENCE
My kids called this "The Raining Color Water" project ;]
What we used....
1. clear glass container
2. shaving cream
3. food coloring
We filled the cup 1/2 full, sprayed a heavy layer of shaving cream on top of the water, then we dropped the coloring (3 - 4 drops) onto the shaving cream.  After a little, tough, patience the colors started dripping through!
*a little tip - I sprayed too much shaving cream on the water.  It took a little too long for the colors to drip through....less shaving cream is better*
I love science...because...children discover so much on their own!  I, more often than not, don't explain too much about the project when we begin it.  For example:  I set the above project up for my kids, sprayed the cream and helped them with the coloring.  Then I let them go...without instruction.  They noticed, on their own, that the shaving cream looked like clouds and the color looked like rain.  After the 'rain' dropped, one of my kids started stirring the cream with a pencil.  The colors mixed together and looked like a twisted rainbow.  So, the other kids grabbed pencils and joined in!  It was a COLOR FEST!  Those glasses were brown, gray and black when we were all finished exploring!
LOOK HOW COOL!
 Thanks, as always, for dropping in to take a peek!  I really appreciate it!
Miss Lisa :]

Thursday, March 8, 2012

animal habitats

This week we discovered where several different kinds of animals live.  We learned who lives in a Jungle, the Forest, in Icy Waters, the Desert, Mountain Lakes and way up high in a very large Nest!  We also talked about what animals lived near us...in the mountains and desert, and which animals live very far away in jungles and the north pole!

Sorting:
I made a simple sort and match game with pictures of different animals and their habitats.  It was super easy (can be done without a laminator) and the children LOVED playing!
I chose: mountain lake = lake trout, desert rocks = rattle snake,  mountain cave = bear (in hybernation), jungle = monkey, ice in the ocean = penguins and huge nest = bald eagle.
I made 6 different "playing boards" (habitats)...just enough to keep their interest.  With each board I copied enough animals to match as I have children in my classroom, so that all my kids would have 1 of each "game piece" (pic of animal to match habitat).  The great thing about this game is YOU create it.  So you can copy pictures of animals and habitats which can be found in your neck of the woods!  Here's how to play:  Teacher: (not revealing the board yet) Give a couple clues regarding the habitat picture you're holding.  Kids: Raise hands when the think they know what habitat you are holding.  Teacher: When more than a couple children guess, reveal the board.  Tell children to look through their game pieces/animal pictures (printed in 2 inch X 2 inch).  If children look confused, give short clues to help them pick.  Kids: Place picture of the chosen animal onto the 'game board' (8.5 X 11) of the matching habitat!  So much fun & super easy.

Science:
An adventure, indeed, was walking through my yard and the near by fields to find animal houses.  We discovered interesting places where animals might possibly live!
Mr. H found my little horse in his stall...so we went in to say "hi!"
My Bigs!  Happily taking a break for a photo op :]
Miss P and Miss M found this jack-o-lantern in the corner of our field!   Well, THAT'S not an animal home...or is it???
My Littles!  To draw their attention away form trying to climb the hay stacks, I announced "Picture Time!" And they were so cooperative ;]
Mr. Z spotted this little burrow in the rocks!  Good Job Mr. Z!

Mr. Z, Miss B and Mr. B curiosly checking the burrow.  What could live in there?  A snake or mouse?  Maybe a bunny or ground squirrel?
We also spotted bird nests up in my pine trees, smashed vegitation where deer have been bedding for the winter and little holes in the hay where little mice live.  The biggest attraction was my golden retriever - his habitat...a back yard and a dog house!  SO MANY opportunities for discussion, it was an amazing activity.

Art:
After learning and talking about so many different animal habitats, we went and created one!  A house for a desert snake.  Although the difficulty level was higher than our normal projects, it turned out to be a success...
A finished snake habitat!  Cool...huh?
Playing with our projects was the best part!  Can you spy the snake hiding in his rock home?
Miss K is painting her 'sage brush' for her snake habitat...
Mr. A is spreading glue all over the bottom of his habitat!  EW...messy & we LOVE it!
Mr. B towards the end of his project...so much glue and sand, got to wipe it off my hands!
Supplies for this project are: a shoe box lid, elmers school glue, sandtastic play sand, 2 toilet paper tubes, gravel, hot glue, scissors, green washable acrylic paint and of coarse...SNAKES!  Plastic dollar store snakes work great :]
How to create this project: 1 - hot glue 1 toilet paper tube to underside of shoe box lid.  2 - dump a 'splotch' of glue into the box lid.  3 - children spread the glue (with their hands!) to cover the entire bottom of the lid.  4 - scoop a 1/2 cup of sand into the lid, shake the lid back and forth, softly, until all the glue is covered with sand.  Set aside to dry.  5 - cut another tube in half, cut 1/2 inch lines from the top of the tube...paint the tube green (that's your sage brush!) then set aside to dry.  6 - bring lid with sand back to the messy table, grab a handful of gravel and spread 1/2 of it onto the bottom of the lid for 'landscape'.  7 - (teacher) hot glue rest of gravel onto the tube in lid.  8 - bend cut pieces of the painted short tube (sage brush) outward until it looks like a bush then place 'sage brush' into box.  9 - pass out snakes...and PLAY!

Our week was full of activity and creativity...what a great learning combination!  I hope you enjoyed our week in pictures and THANKS for stopping in!

Miss Lisa :]

Thursday, March 1, 2012

we are taking care of our hearts!

Lot's of fun and active learning at My Little Preschool this week!

Lego's seemed to be the building 'medium' of choice (for all the kids!) this week.  Free time turned into a construction zone for Lego Town!  Little Miss K show's off a super cool building she made to go with the trucks, cars and little town items that were created by her and her friends!

my "littles" practicing self control
Life Skill of the week - Self Control:
Every week I pick a 'life skill' to learn and practice.  Sense this week was 'self control' I decided it would be fun to see how long the children could control themselves from moving towards a 'dangling carrot'!  The dangling carrot was a Kit Kat candy bar!  I asked them if they would like to just run up and bite into the chocolate bar.  Of course they responded with screeches and whooping!  That's when I told them they could only have it IF they listened, followed rules and controled their movments...they all looked at me like, "Huh?"  That was when I explained the rules of the game "Red Light, Green Light" and then they agreed to give it a try!  I was impressed with the self control they displayed as they moved closer and closer to the candy bar; listening for instructions, looking for the 'light' to change and even moving backward if they moved forward after the light turned red!  In the end everyone received a Kit Kat bar as a reward for having self control.  MUCH FUN :]

Letters/Writing:
In my BIGS class we learned about things that help our heart stay healthy and strong. For writing practice we wrote, inside a heart shape, what and how much we should eat to keep our hearts happy.  Not only were we practicing letters, but numbers too.  The kids had to write down each food group and the number of servings we need of each!  We had a cute little chat about how vegetables are not very popular.  But, when they saw that vegi's were the food we should be eating the most of, they were very discriptive about which vegi's they would eat more of and which one's they might even dare try!  All this talk, totally UNprompted by teacher, was fun to be a part of.
Miss P loves to write...she is doing a fine job!

LITTLES learned R is for Robot & S is for Snake!  Miss M and Mr. B are coloring so good and their snakes turned out great! 
Science - what makes our hearts beat?
All my cute little kids got to make their own stethoscope this week.  But, in order to hear our hearts beat we had to get them pumping.  We played games that involved jumping, kicking, punching and marching...that got our hearts going!  After each activity we would feel our hearts.  We found that jumping jacks made our hearts beat the hardest and punching the air was the most fun!  After all of our exercising we listened through our stethoscopes to hear how hard our hearts began beating!  It was hard to hear, we had to be really quiet...AH! We heard it!  This activity proved to be a great success as the kids just wanted to keep playing this game and not get ready to go home :]
My littles hopping on one foot!  We took a couple deep breaths after this activity ;]
To make a stethoscope, the My Little Preschool way, you need:  a cheap garden hose, small automotive funnels, duct tape and pruning shears.  Cut the hose (with pruning shears) into 1 1/2 ft. peices, enough for each child.  Then cut bottoms of funnels off so they will easily fit over the end of the cut hose.  Duct tape the funnel to the end of each side of the hose.  That's it...now listen to your heart or someone elses :]  Have fun!

Thanks, as always, for stopping by!
Miss Lisa :]

Friday, February 24, 2012

assessment week...so boring!

Oh boy, trying to make Review and Assessment Week fun and exciting is a challenge for me.  I came up with a few (not new, but fun) ways to review what we've learned so far this year.  I wanted to keep it simple so the children would understand what we were doing.  We discussed what an "assessment" was, and they were actually super excited to be tested!  

NUMBERS:
Thanks to worksheetfun.com I found a simple way to trace and practice numbers 1 - 10.  We traced the numbers and then put that many freckles (dots) on that particular finger.  It was a little bit boring, but the kids enjoyed dotting their fingers and some of them colored their hands with bright markers.  Little Miss A did a great job and followed my instructions very well :]

SHAPES:
When we practiced our shapes I got the sand out!  My kids LOVE our sand and rice play...so I knew they would enjoy reviewing in the sand :]  From Circles to Stars we practiced drawing the shapes with our fingers.  Some of my kids drew their own shapes and then told me to come see what they had drawn (which was the point of the activity all along).  My kids love shapes...we talk about them a whole lot, so this activity was very rewarding for them.  It was fun to watch them draw out shapes within shapes and connect a few shapes to make a  picture...so creative!
(I always use shallow cookie sheets from the dollar store for sand play...just the right size, easy to use and clean)


 COLORS:
My favorite is playing with color...not always my kids favorite though so I have to be careful ;]  A big thank you to prekinders.com for this cute printable!  It's meant for "bug catching" but I couldn't find enough colored bug stickers to make it work...so, instead we caught frogs!  We all had fun catching the right colored frog to match our jar lid. I was so proud of how great my littles did with this project!  Our pink and purple frogs were so similar in color it was hard to sort them out...but my kids did it!  Good Job!
(I use stickers quite a bit.  They are cheap and easy to use.  My kids love stickers too, they ask to use them in projects and for rewards)


LETTERS:

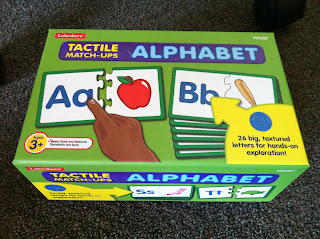
These letters are bumpy, and the kids love connecting the puzzle pieces.  I, however, am still a big fan of the plain old sandpaper letters for tactile learning.  I am super grateful for ALL the MANY sources of learning materials out in our gigantic world!

I used this matching game, from lakeshore learning, to review our letters and sounds.  There are several ways to play...we simply used the 'matching game' rules this time.  Some of my kids were loosing interest by the end of the game, but most of them hung in there!  My bad, because I left this activity for the end of our day.

Our Assessment day went well.  I was amazed at what some of my kids have retained!  Colors and Shapes were known very well by all.  Letters and Sounds need a bit of work, but I was mostly impressed with what my kids knew about Numbers!  They spoke of beginning knowledge of addition and subtraction and can count higher than I expected...GREAT JOB my kids!!!

Have a fantastic weekend!
Miss Lisa ;]

Thursday, February 16, 2012

valentines & vibrant vases!

Valentines day/week is always a special one.  It forces us to take a look at who we really love.  My little preschoolers mostly loved their mom's or grandma's...and I would have to agree, I love mine too :]

We took to cutting some hearts out!  A simple tast you might think, but not really.  Cutting around the top was not easy and some needed a bit of help.  They asked several times, "Miss Lisa...you do it for me."  I said, "Not until you try it first."  They all gave it a valiant effort and to my surprise most of them cut their WHOLE heart out!  Good Job my Cool Kids, you did it!!!  Painting the hearts was not a problem...they enjoyed every bit of that...without any assistance ;]

practicing small motor skills during art time...
Miss M and Mister Z working well to make their hearts pretty & perfect
just look at our cutting skills...we did so good :D

Exploring shapes...
Since the shape of the month is the Heart, we watched an episode of Blue's Clue's called "Love Day" and the kids were so concentrated on figuring out who sent Joe the big heart valentine!  I'm never a big fan of sitting kids down in front of a T.V., however, this proved to be great learning time :]
just so cute ... watching some Blue's Clue's :]
Creative art...
Vases and votives that catch the light!  I wasn't sure this activity would go over very well (especially with my littles), but they did great.  I was super impressed with their focus and follow through.  We used just dollar store vases and left over tissue with a little bit of modge podge and Ta-Da...look how beautiful!
Mister J loves BYU so BLUE it is :]
Mister H was so proud of his work...it looks awesome!
Miss M was bound and determined to cover every square inch of her vase!
Miss A's "focus" face makes me smile...she chose just white and it was beautiful.  Made the vase look frosted, cool!
End results were amazing...

Littles made votive's to catch a candles light.  It took a bunch of concentration and their projects were all unique and so pretty...

Thursday, February 2, 2012

all the pretty shapes...

SHAPES are fun!
Number Time:
With just 5 strips of paper (equal length) and 4 brads...we created so many different shapes!  It was very interesting to twist and turn our strips of paper into shapes of things we didn't even know we could make.  We left the ends unconnected so we could continue to make many more shapes over and over again.  Some of the kids decided to make their super cool shapes more perminant by putting a brad into the ends (upon shape completion!) and carefully placing them into their backpacks to take home and show mom and dad :]
a STAR is the shape we practiced making during "Magic Math" time!
oh my!  one of my little Miss M's found she could make her paper strips into a HOUSE! 
the boys found that if you bunch some of the lines together you can create a shape with less than 5 lines...like a TRIANGLE! 
the DIAMOND was a popular shape to make :]
another one of my Miss M's made a KITE...wow, who knew???
Creative Art:
Towards the end of the week (since we're not getting any real snow) we decorated paper snowmen and snowgirls with various shapes!  Everything from squares to flowers, the shapes turned our snowpeople into amazingly awesome creatures!
My BIGS class added a little artistic marker drawings to their snowpeople which made them even more appealing!  Here we have a snowman who spilled red punch all over the front of him, a super "shapely" long haired snowgirl with sunglasses on and a decorated snowman with hair, a belly button and some ear muffs!
This activity was a perfect one for 'sticker happy' kids!  Miss A even put a flower in her snowgirls hair...so beautiful!
Many, Many shapes ended up on our faces...very cool ;]
We practiced writing our letters and names a whole bunch this week.  We found many different places to write our names and some letters.  Mr. J was delighted to be able to use the 'Letter Time' board to write his name on!  We wrote on our chalkboards, colored papers, snack time cups and more...what fun writing adventures!

I never cease to be amazed at what my little ones love to do!  I wasn't sure if my shape lessons would keep them all that interested this week?  But to my surprise, they had a blast!  We kept finding shapes in our toys and learning tools, we also found shapes outside like: trees (some are circles, some are triangles), mountains are triangles, the moon is a cresent and the sun is a circle...even though it's really a star??!!  The amazement of shapes made our week great!

A great book, that we integrated into our learning time was...
Both my BIGS and LITTLES love this book.  Searching for shapes on every page was so rewarding!

Happy Day!
Miss Lisa :]